Adobe Audition isn’t just another DAW; it’s a total audio powerhouse. From basic waveform editing to mind-blowing spectral manipulation, Audition lets you sculpt soundscapes like a digital Michelangelo. Whether you’re a podcasting pro, a music maestro, or just someone who needs to clean up that noisy recording of your aunt’s birthday speech, Audition has the tools to make your audio dreams a reality.
This guide dives deep into its features, exploring everything from mastering techniques to fixing those pesky clicks and pops that haunt your audio files.
We’ll cover the core features, walking you through workflows for common tasks like basic editing and podcast production. Then, we’ll explore the advanced stuff—mastering, audio restoration, spectral editing, and even MIDI manipulation. We’ll also touch on how Audition plays nicely with other Adobe apps, making your creative process even smoother. Get ready to unlock the full potential of this awesome audio software!
Adobe Audition’s Core Features
Okay, so Adobe Audition. It’s a seriously powerful audio workstation, and while it might seem intimidating at first, once you get the hang of it, you’ll be amazed at what you can do. It’s got a ton of features, but let’s focus on the core stuff that makes it tick.
Audition’s strength lies in its combination of waveform editing, multitrack editing, and a robust effects library. This makes it suitable for everything from basic podcast cleanup to advanced audio restoration and even music production. It’s a bit of a jack-of-all-trades, but unlike many jack-of-all-trades, it excels at all of them.
Waveform Editing
This is where the magic happens. Audition’s waveform editor lets you zoom in on your audio to the tiniest detail, making precise edits like removing clicks, pops, and other unwanted noises. You can cut, copy, paste, and even use Audition’s powerful selection tools to isolate specific sections of audio with surgical precision. Imagine needing to remove a cough from a podcast recording – you can select that cough with pinpoint accuracy and delete it without affecting the surrounding audio.
You can also use this to carefully adjust the timing of audio, something essential for podcasting and music production. This level of control is key for cleaning up recordings and achieving a polished final product.
Multitrack Editing
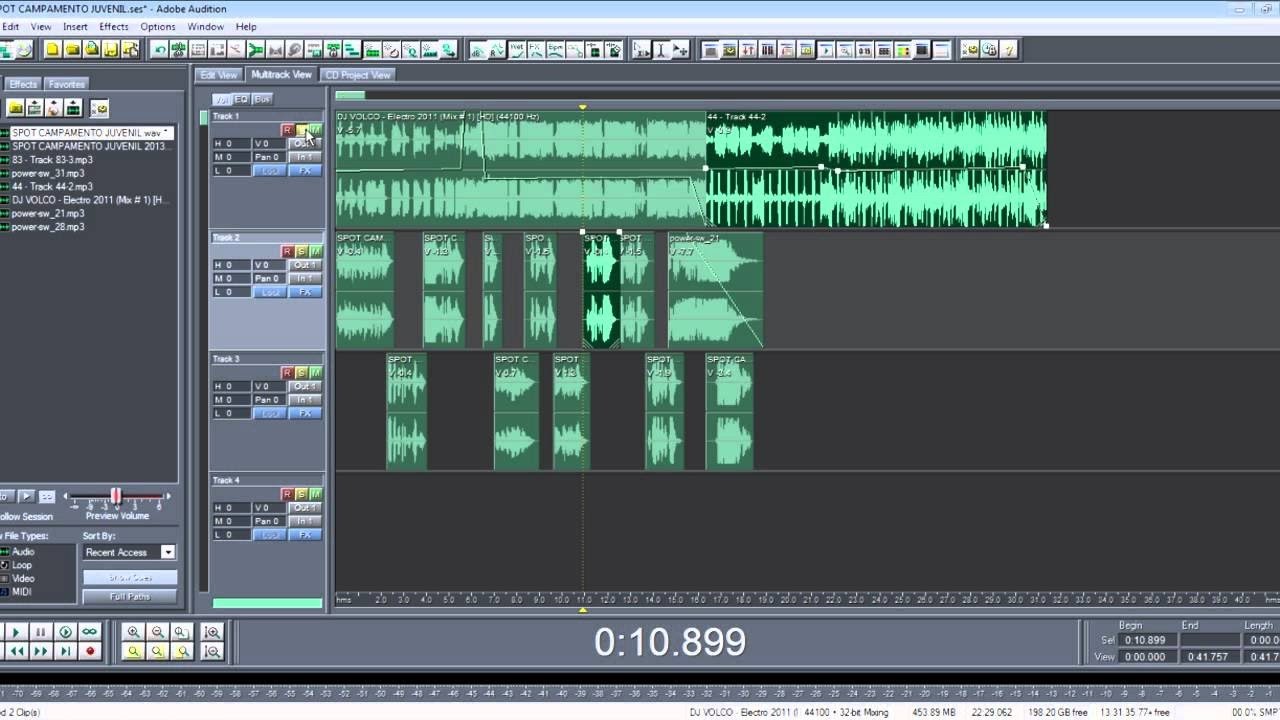
Need to work with multiple audio tracks simultaneously? Audition’s got you covered. Its multitrack editor lets you arrange and mix different audio elements – like vocals, instruments, and sound effects – all in one project. You can adjust the volume, pan, and add effects to individual tracks independently, giving you complete control over your final mix. Think of it like a digital mixing console, but with even more flexibility and power.
For example, you could layer multiple guitar tracks, adjust their levels and EQ, and add reverb to create a richer, more professional-sounding mix.
Effects Processing
Audition boasts a comprehensive collection of audio effects, ranging from basic EQ and compression to more advanced tools like noise reduction, reverb, and delay. These effects are crucial for shaping the sound of your audio and achieving the desired sonic quality. Many effects offer real-time previews, allowing you to hear the changes you make instantly. This means you can experiment and find the perfect settings without having to render your audio repeatedly.
For example, a de-esser can help tame harsh sibilance in vocal tracks, while a compressor can even out the dynamics of a recording, making it sound more polished and professional.
Comparison with Other DAWs
Audition holds its own against other popular DAWs like Pro Tools, Logic Pro X, and Ableton Live. While Pro Tools is often favored in professional recording studios for its industry-standard workflow and integration with hardware, Audition offers a more accessible and often more affordable entry point with a similar feature set. Logic Pro X is known for its intuitive interface and extensive instrument library, while Ableton Live excels in live performance and electronic music production.
Audition, however, stands out due to its powerful restoration and mastering capabilities, making it a great choice for podcasters, audio editors, and anyone needing to clean up or enhance audio.
Basic Audio Editing Workflow
Let’s Artikel a simple workflow for a common task: cleaning up a noisy podcast recording.
- Import Audio: Import your podcast recording into Audition.
- Noise Reduction: Use Audition’s noise reduction tool to identify and reduce background noise. You’ll typically select a section of quiet audio to create a noise profile, then apply the reduction to the entire track.
- Clip Editing: Locate and remove any unwanted noises like coughs, clicks, or background conversations using Audition’s precise editing tools. This involves carefully selecting and deleting the unwanted sections.
- EQ and Compression: Apply EQ to adjust the frequency balance of your audio, boosting certain frequencies and cutting others to achieve a more balanced sound. Compression can even out the dynamics, making the audio sound more consistent.
- Export: Once you’re satisfied with your edits, export the audio in your desired format (like MP3 or WAV).
Mastering Audio with Adobe Audition
So, you’ve got your awesome track all mixed and ready to go. But before you unleash it on the world, you need to master it. Mastering is the final stage of audio production, where you polish your mix to make it sound its absolute best across all playback systems. Think of it as the final coat of paint on a masterpiece.
Adobe Audition is a powerful tool for this crucial step, offering a suite of effects and processing capabilities to achieve a professional-sounding master.Mastering in Audition involves a nuanced approach to manipulating your audio’s dynamics and frequency balance. This ensures consistency across different listening environments and maximizes the impact of your music. It’s about achieving clarity, loudness, and a cohesive sonic signature without compromising the integrity of your mix.
We’ll explore the key techniques and a step-by-step process to get you there.
Equalization in Mastering
Equalization (EQ) during mastering is subtle but crucial. It’s not about drastic changes like in mixing; instead, it focuses on fine-tuning the overall frequency balance, addressing any inconsistencies or muddiness that might have crept in during the mixing stage. This often involves gentle boosts or cuts in specific frequency ranges to create a more balanced and polished sound.
For example, a slight cut around 250 Hz might help reduce muddiness in the low-midrange, while a gentle boost around 5 kHz could add some air and clarity to the high frequencies. Audition provides a variety of EQ plugins, from parametric EQs offering precise control over frequency, gain, and Q (bandwidth), to more simplified graphic EQs for visual adjustments.
The goal is to achieve a smooth and natural sound that translates well across different systems.
Compression in Mastering
Compression is used in mastering to control the dynamic range of your track. While mixing compression focuses on individual tracks or groups, mastering compression targets the overall mix. This process involves reducing the difference between the loudest and quietest parts of your audio, resulting in a more consistent and punchy sound. It’s important to use compression sparingly during mastering, avoiding excessive reduction that can lead to a lifeless or squashed sound.
A gentle compression with a ratio of 2:1 to 4:1, and a slow attack and release time, is often sufficient to glue the elements together and add punch without sacrificing dynamics. Audition offers various compressor plugins, allowing for different approaches depending on the specific needs of your track.
Limiting in Mastering
Limiting is the final step in the mastering process, aiming to maximize the loudness of your track while preventing clipping (distortion caused by exceeding the maximum amplitude). Limiters work by reducing the peaks of your audio signal, ensuring that the overall loudness remains consistent without exceeding the digital ceiling. However, over-limiting can result in a harsh, brittle, and dynamically compressed sound.
So, I’m totally swamped with editing audio for my podcast using Adobe Audition – it’s a beast, but I’m getting the hang of it. Between all that and trying to manage my freelance gig’s finances, I’m thinking of switching to intuit payroll to make things easier. Hopefully, that’ll free up some time so I can finally master those advanced Adobe Audition features.
Back to editing!
The key is finding a balance between loudness and preserving the dynamics and character of your mix. Audition provides several limiter plugins, each with its own characteristics and settings, allowing for a tailored approach to achieve the desired loudness without sacrificing audio quality. Remember, the goal isn’t to make your track the loudest possible; it’s to make it sound its best within its dynamic range.
Step-by-Step Guide to Mastering a Song in Audition
Before you begin, ensure you have a well-mixed and edited audio file. Any significant mixing issues should be addressedbefore* mastering. A good mix is the foundation for a great master.
- Gain Staging: Start by setting the overall gain of your track. Aim for a peak level around -18dBFS to leave headroom for subsequent processing. This prevents clipping and allows for more dynamic control.
- EQ: Apply subtle EQ adjustments to address any frequency imbalances. Focus on gentle boosts and cuts to enhance clarity and balance, rather than drastic changes. Pay attention to the low-end (sub-bass and bass), mid-range (vocals and instruments), and high-end (air and detail).
- Compression: Use compression to control the dynamics and add punch. Start with a low ratio (2:1 to 4:1) and adjust the attack and release times to suit the material. Listen carefully and avoid over-compressing.
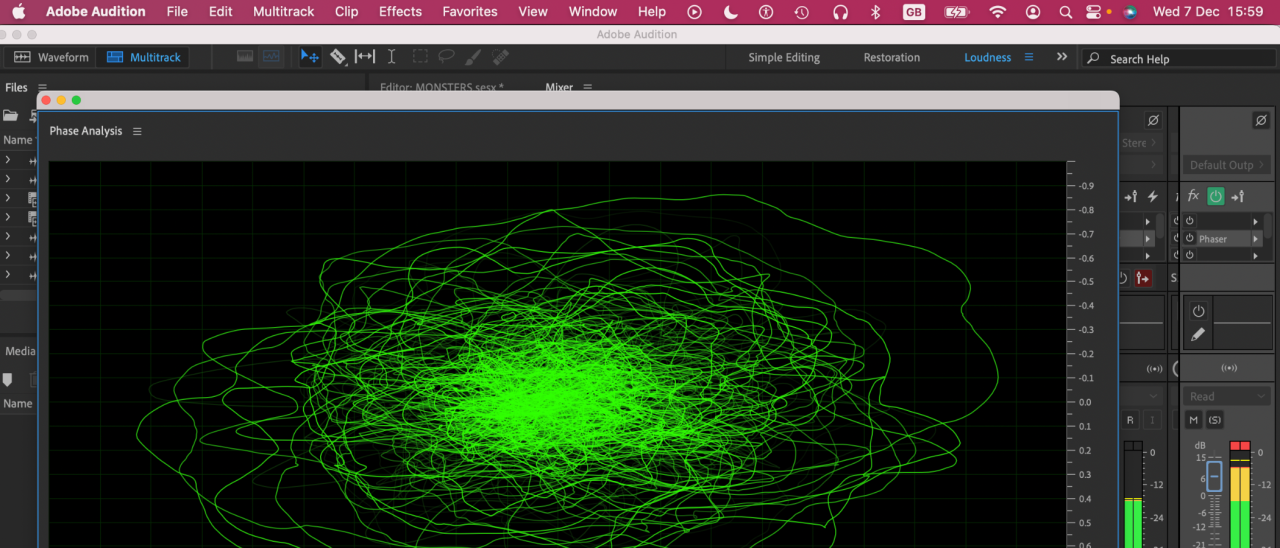
- Stereo Widening (Optional): If needed, subtly widen the stereo image to add spaciousness. However, be careful not to create phase issues or unnatural sounds.
- Limiting: Finally, apply limiting to maximize loudness while preventing clipping. Start with a low gain reduction and gradually increase until you achieve the desired loudness, always prioritizing audio quality over sheer loudness. Audition’s limiter offers various algorithms, allowing you to fine-tune the limiting process.
- Export: Once you are satisfied with the master, export the audio file in the appropriate format (e.g., WAV or AIFF) with the correct bit depth and sample rate. Remember to check the final output for any artifacts or inconsistencies.
Advanced Audio Effects in Adobe Audition
Okay, so we’ve covered the basics of Audition. Now let’s dive into the really fun stuff – the advanced audio effects that can transform your audio from “meh” to “amazing.” We’ll explore some powerful tools that let you sculpt your sound with precision and creativity. Think of it as moving beyond simple volume adjustments and EQ to truly mastering the art of audio manipulation.
Audition boasts a wide array of advanced effects, each capable of adding unique character and polish to your projects. Understanding how these effects work and how to use them effectively is key to creating professional-sounding audio. We’ll focus on some of the most commonly used and versatile effects, highlighting their key parameters and demonstrating how to apply them for optimal results.
Reverb, Delay, and Pitch Correction
Reverb simulates the natural reflections of sound in a space, adding depth and ambience. Delay creates echoes, adding rhythmic interest and texture. Pitch correction, often called auto-tune, adjusts the pitch of individual notes or entire vocal tracks to achieve perfect intonation. These three effects are fundamental to modern audio production, used in everything from subtle enhancements to dramatic special effects.
Mastering these tools will significantly improve your audio mixing and mastering skills.
Comparing Reverb Plugins in Audition
Audition offers several reverb plugins, each with its unique characteristics. For instance, the built-in “Reverb” effect provides a straightforward approach to adding ambience, while third-party plugins often offer more sophisticated control and specialized algorithms. The differences might lie in the type of reverb algorithm used (convolution reverb offering highly realistic spaces, plate reverb for a classic shimmer, etc.), the control over parameters (pre-delay, decay time, diffusion), and the overall sound quality.
Choosing the right reverb depends on the desired effect and the specific sonic characteristics of your audio. Experimenting with different reverb plugins is essential to find the perfect match for your project.
Audition Effects Parameters and Uses
The following table Artikels the parameters and uses of five common Audition effects. Understanding these parameters allows for precise control over the effect’s impact on your audio.
| Effect | Parameter | Use | Example |
|---|---|---|---|
| Reverb | Decay Time | Controls how long the reverb tail lasts. | Longer decay for large halls, shorter for smaller rooms. |
| Delay | Delay Time | Sets the time between the original sound and the echo. | Short delays for subtle thickening, longer delays for rhythmic effects. |
| Pitch Correction | Sensitivity | Determines how aggressively the pitch correction is applied. | Higher sensitivity for strong correction, lower for subtle adjustments. |
| Equalizer (EQ) | Frequency Bands | Allows for boosting or cutting specific frequencies. | Boosting highs for clarity, cutting muddiness in the low mids. |
| Compressor | Threshold | Sets the level at which compression begins. | Lower threshold for more aggressive compression, higher for subtle level control. |
Audio Restoration with Adobe Audition
Okay, so we’ve covered the basics and some seriously cool effects in Audition. Now let’s get into the nitty-gritty—saving those old, crackly recordings from oblivion! Audio restoration is where Audition really shines, letting you rescue recordings damaged by time, poor recording conditions, or just plain bad luck. We’re talking about bringing back those cherished family recordings or rescuing that awesome field recording you almost gave up on.Audio restoration in Audition involves a variety of techniques aimed at cleaning up unwanted noise and artifacts.
It’s a process that often requires a bit of trial and error, but the results can be incredibly rewarding. Think of it as digital archaeology—carefully excavating the good audio from the surrounding debris.
Noise Reduction
Audition’s noise reduction tools are your secret weapon against hiss, hum, and other unwanted background sounds. The process generally involves selecting a sample of the noise you want to remove (a section with only noise, no audio) and then applying the noise reduction effect to the entire track. Audition analyzes the noise profile and then subtracts it from the audio, leaving behind a cleaner signal.
The strength of the effect is adjustable, allowing you to fine-tune the balance between noise reduction and preserving the quality of your audio. Over-aggressive noise reduction can result in a muffled or unnatural sound, so it’s best to start with a gentle approach and gradually increase the intensity as needed. For example, you might start with a noise reduction of 5dB and incrementally increase it until the hiss is reduced to an acceptable level without sacrificing the clarity of the vocals or instruments.
Click Removal and Declicking
Clicks and pops are the bane of many older recordings, often caused by dust or scratches on the original media. Audition offers several tools to tackle these pesky artifacts. The “Click Repair” tool allows for pinpoint removal of individual clicks by manually selecting and repairing them. This method is great for dealing with isolated clicks, but for a recording littered with them, Audition’s “Declicker” effect is more efficient.
This effect automatically analyzes the audio and identifies and removes clicks and pops based on their spectral characteristics. The declicker effect’s settings (like threshold and frequency range) can be adjusted to fine-tune the process and prevent the removal of desirable audio signals. For example, if you have a recording with frequent high-frequency clicks, you might adjust the frequency range of the declicker to focus on those specific clicks without affecting lower-frequency sounds.
Restoring a Damaged Audio File
Let’s imagine we have a recording of a vintage vinyl record with significant surface noise and pops. First, we’d isolate a section of the audio containing only the background noise. Then, we’d apply Audition’s noise reduction to this section. Next, we’d select the entire audio track and apply the effect again, adjusting the parameters until a good balance is achieved between noise reduction and maintaining audio quality.
Following that, we’d use the Declicker effect, carefully adjusting its parameters to eliminate the pops without losing the subtle nuances of the music.
Before: The audio is filled with a significant amount of surface noise (hiss) and several noticeable pops and clicks, making it difficult to discern the underlying music clearly. The overall sound is muffled and unpleasant.
After: The noise reduction and declicking processes have significantly improved the audio quality. The background hiss is greatly reduced, and the pops and clicks are almost entirely gone. The music is now much clearer and more enjoyable to listen to, revealing details previously obscured by the noise. The overall sound is much cleaner and more pleasant.
Podcast Production in Adobe Audition
So, you’ve mastered the basics of Audition and want to dive into the world of podcasting? Great! Adobe Audition is a powerful tool for creating professional-sounding podcasts, from initial recording to final mastering. This section will walk you through the entire workflow, offering tips and tricks to help you polish your audio and create a captivating listening experience.
The podcast production process in Audition generally involves three main stages: recording, editing, and mastering. Each stage builds upon the previous one, culminating in a polished, ready-to-publish podcast episode. Efficient workflow is key to managing your time effectively and ensuring a high-quality final product.
Recording Podcast Audio in Adobe Audition
Audition’s multitrack environment is ideal for podcast recording, especially for multi-person shows. You can set up individual tracks for each participant, allowing for independent volume adjustments and easier editing later. Before recording, ensure your microphone levels are properly calibrated to avoid clipping (distortion caused by overly loud signals). Use headphones to monitor your audio and minimize feedback.
Consider using a pop filter to reduce plosives (harsh ‘p’ and ‘b’ sounds). For a clean recording, choose a quiet environment with minimal background noise. A consistent recording level is essential for a professional sound. Remember to create a new session for each episode to keep your project files organized.
Editing and Mixing Podcast Audio
Once recorded, the editing process begins. Audition provides a comprehensive suite of tools for this. This includes removing unwanted noises (like coughs, clicks, or background hums) using the noise reduction and spectral editing tools. You can also use the essential sound tools like the waveform editor to cut, copy, and paste audio sections. Precise editing is crucial for creating a seamless and engaging listening experience.
Pay attention to timing, ensuring smooth transitions between segments. Mastering the use of fades (both in and out) will dramatically improve your podcast’s flow. For multi-person podcasts, you might need to adjust individual track levels to balance the audio, ensuring each voice is clear and audible.
Mastering Podcast Audio in Adobe Audition
Mastering is the final stage, where you apply global adjustments to achieve the desired overall sound. This might involve subtle compression to even out the dynamic range, equalization to shape the frequency balance, and limiting to ensure consistent loudness without clipping. Audition’s mastering tools are intuitive and powerful, offering various options for shaping your audio. Remember, the goal of mastering is to create a consistent and engaging listening experience that sounds great across different playback systems.
Careful attention to detail during mastering can significantly improve the professional quality of your final product. Exporting in a high-quality format (such as MP3 at a suitable bitrate) is also a crucial aspect of this final stage.
Podcast Audio File Organization Template in Adobe Audition
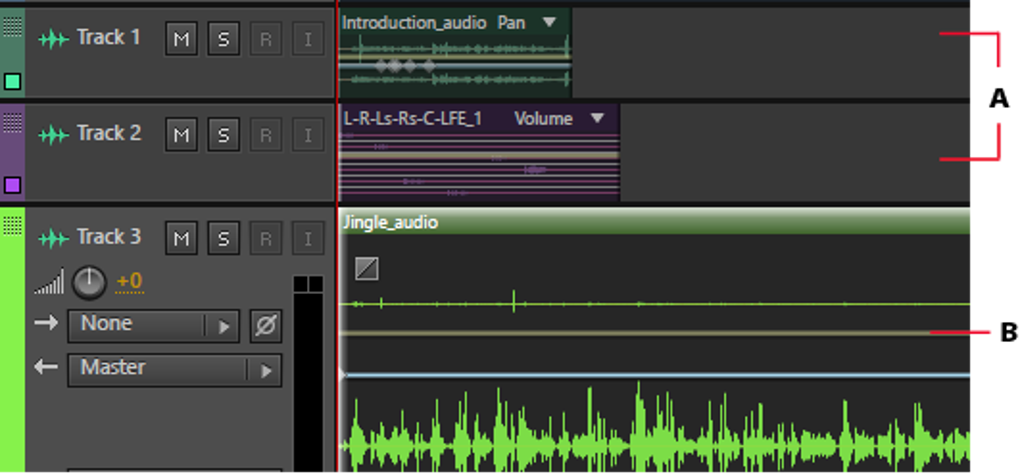
A well-organized multitrack session is essential for efficient podcast production. Consider a template where each track is clearly labeled. For example:
- Track 1: Host Microphone
- Track 2: Guest 1 Microphone
- Track 3: Guest 2 Microphone
- Track 4: Music/Sound Effects
- Track 5: Voiceover/Intro/Outro
This clear labeling allows for easy identification and manipulation of individual audio elements. Color-coding tracks can further enhance organization and visual clarity within the multitrack view. Using this consistent template for each episode ensures consistency and simplifies the workflow. This approach will save you significant time and effort in the long run, especially as your podcast grows.
Working with MIDI in Adobe Audition
Okay, so we’ve covered a bunch of awesome stuff in Audition – mastering, effects, restoration, even podcasting. But what about MIDI? Audition isn’tprimarily* a MIDI sequencer like Ableton or Logic, but it does have some surprisingly robust MIDI capabilities, especially useful for integrating MIDI instruments and composing within a broader audio editing workflow. Think of it as a handy tool in your arsenal, not a full-fledged replacement for dedicated DAWs.Audition’s MIDI functionality lets you import existing MIDI files, edit their notes, and even create new MIDI tracks.
While it lacks some of the advanced features of dedicated DAWs, its simplicity makes it a great option for quick MIDI tasks and integration with your audio projects. Let’s dive into how it works.
Importing and Editing MIDI Data
Importing MIDI files into Audition is straightforward. You simply drag and drop the MIDI file (.mid) into your Audition session. Audition will create a new MIDI track, displaying the MIDI data as a piano roll-style editor. You can then zoom in and out, select individual notes or groups of notes, and adjust their pitch, velocity, and timing. Editing is done visually, allowing you to easily change the melody, rhythm, or dynamics of your MIDI data.
Think of it like editing a score; you’re manipulating the musical information directly, not the audio waveform. Common editing functions include cutting, copying, pasting, and quantizing notes to correct timing imperfections.
Creating and Manipulating MIDI Tracks
While Audition isn’t designed for complex MIDI composition from scratch, it allows for creating new MIDI tracks and adding notes manually. You can select a MIDI instrument from the list of available virtual instruments (VST instruments need to be installed separately). Once you’ve chosen an instrument, you can draw notes directly onto the piano roll, creating your melody and harmony.
You can also use the tools to input notes using a MIDI keyboard controller if connected. This feature is excellent for quickly sketching out ideas or adding MIDI parts to an existing audio project. The manipulation of these newly created tracks mirrors the editing capabilities described in the previous section.
Comparison of Audition’s MIDI Capabilities to Other DAWs, Adobe audition
Audition’s MIDI capabilities are significantly less extensive than those found in dedicated Digital Audio Workstations (DAWs) like Ableton Live, Logic Pro X, or Pro Tools. DAWs offer far more sophisticated MIDI editing tools, including advanced automation, complex MIDI effects, and extensive support for external MIDI controllers. Audition’s strength lies in its integration with its powerful audio editing features, making it ideal for tasks involving integrating pre-existing MIDI data with audio or quickly creating basic MIDI parts.
If your project demands extensive MIDI composition or manipulation, a dedicated DAW would be a better choice. However, for basic MIDI editing and integration with audio, Audition offers a surprisingly user-friendly and effective solution.
Audition’s Integration with Other Adobe Products: Adobe Audition
Okay, so we’ve covered a ton about Audition’s awesomeness on its own, but the real magic happens when you integrate it with other Adobe apps. Think of it as the audio powerhouse that makes your entire creative project sing. The seamless workflow between Audition and other Creative Cloud apps is a game-changer, especially for video editors and multimedia wizards.Audition’s tight integration with Premiere Pro and After Effects allows for a truly collaborative and efficient post-production process.
This interconnectedness streamlines your workflow, saving you time and headaches, and letting you focus on the creative aspects of your project.
Premiere Pro and Audition Workflow
Imagine this: you’re editing a video in Premiere Pro, and the audio just isn’t cutting it. Maybe the dialogue is muddy, or you need to add some sweet sound effects. Instead of wrestling with Premiere Pro’s limited audio tools, you simply send the audio to Audition for a professional-grade cleanup and enhancement. Once you’re done polishing the audio in Audition, you send it back to Premiere Pro, and it’s seamlessly integrated back into your timeline.
No more format issues, no more compatibility nightmares. Just pure, unadulterated audio bliss.A typical workflow might involve exporting the audio from a Premiere Pro sequence as a multitrack file (.sesx). This preserves all the individual audio tracks and their positions within the timeline. Then, in Audition, you can edit each track individually, applying effects, removing noise, and generally making it sound amazing.
Once you’ve completed your audio edits, you can export the audio back to Premiere Pro, often in the same format you imported it as. The timeline should automatically update with the changes. This process allows for non-destructive editing, meaning your original audio remains untouched, ensuring you always have a fallback option.
After Effects and Audition Collaboration
Similarly, Audition integrates beautifully with After Effects. If you’re creating a motion graphics project and need to add or manipulate audio, Audition offers the tools to create custom sound effects, design unique soundtracks, and even refine existing audio elements to perfectly synchronize with your animations. You can export audio from After Effects to Audition for detailed editing, then re-import the enhanced audio back into your project, ensuring a polished and professional final product.
This seamless transition between programs eliminates the need for complex workarounds and allows for a more focused and efficient creative process. For example, creating Foley sounds for an animated short film can be done much more efficiently in Audition and then imported back into After Effects. The precision offered by Audition’s editing tools can add a level of realism that would be hard to achieve directly within After Effects.
Troubleshooting Common Audition Issues
Let’s face it, even the most seasoned audio editors encounter snags in their workflow. Adobe Audition, despite its power, isn’t immune to occasional hiccups. This section will cover some common problems and offer practical solutions to keep your audio projects running smoothly. We’ll also look at ways to optimize Audition’s performance and prevent common mistakes.
Performance Optimization Strategies
Audition can be resource-intensive, especially when working with large, high-resolution audio files or complex effects. To ensure a smooth workflow, several strategies can be implemented. Consider increasing the RAM allocated to Audition in the application’s preferences. This allows Audition to access more system memory, leading to improved performance, particularly when handling multiple tracks or applying real-time effects. Another key step is to regularly close any unnecessary applications running in the background.
These applications can consume valuable system resources, impacting Audition’s responsiveness. Finally, working with lower sample rates and bit depths when possible can significantly reduce the processing load, resulting in a more fluid editing experience. For example, converting a 96kHz/24-bit file to 44.1kHz/16-bit will reduce the file size and processing time without a significant loss of audio quality in many situations.
Addressing Audio Playback Issues
Experiencing audio glitches, dropouts, or crackling sounds during playback is frustrating. Several factors could be the cause. First, check your audio interface drivers. Outdated or corrupted drivers are a frequent culprit. Ensure you’re using the latest drivers from the manufacturer’s website.
Next, examine your audio hardware. Loose connections or faulty equipment can introduce noise and dropouts. Try different audio outputs or cables to isolate the problem. If the issue persists, consider the possibility of buffer size issues. A buffer size that is too small can lead to dropouts, while one that’s too large introduces latency.
Experiment with adjusting the buffer size within Audition’s preferences to find an optimal balance.
Resolving Crashes and Freezes
Unexpected crashes or freezes can disrupt workflow and lead to lost work. The first step in troubleshooting is to ensure Audition is updated to the latest version. Updates often include bug fixes and performance improvements. Check for any conflicting software or plugins. Incompatible plugins can cause instability.
Try disabling plugins one by one to identify the culprit. Also, ensure your system meets the minimum system requirements for Audition. Insufficient RAM or processing power can lead to crashes. If the problem persists, consider reinstalling Audition. A clean reinstall can resolve underlying issues that may be causing the crashes.
Lastly, check your hard drive space. Insufficient space can prevent Audition from functioning correctly.
Preventing Common Editing Mistakes
Many common errors can be prevented through careful planning and good practice. Always back up your projects regularly to prevent data loss. Use version control features, if available, to track changes and revert to earlier versions if needed. Before making major edits, create a copy of your original audio file. This prevents irreversible changes to your source material.
Employ non-destructive editing techniques whenever possible. This ensures you can always return to the original audio. For example, use automation clips instead of directly editing audio levels. Finally, listen critically and use headphones to ensure your edits sound natural and free of artifacts. This attentive listening process is key to professional quality audio production.
Customizing Audition’s Workspace
Okay, so you’ve mastered the core features of Audition, and you’re rocking those advanced effects. But let’s be real, spending hours hunting for that one specific effect or constantly readjusting your windows gets old fast. Customizing your workspace is key to boosting your efficiency and making Audition feel likeyour* personal audio studio. It’s all about making the software work for you, not the other way around.This section will walk you through how to personalize your Audition environment for a smoother, more productive workflow.
We’ll cover customizing your workspace layout, creating custom keyboard shortcuts, and organizing your interface for optimal efficiency. Think of it as decluttering your digital audio toolbox – it’s surprisingly satisfying!
Workspace Layout Customization
Audition offers a high degree of flexibility in arranging its panels and windows. You can dock panels, undock them to become free-floating windows, or even create entirely custom workspaces saved for specific tasks. For example, you might have one workspace optimized for audio restoration, with the spectral frequency display prominent, and another workspace focused on podcast editing, with the multitrack view maximized.
To customize, simply drag and drop panels to rearrange them, or click the “Window” menu for more options, including saving and loading custom workspace layouts. This is particularly helpful for those who regularly switch between different audio editing tasks.
Creating and Managing Custom Keyboard Shortcuts
Keyboard shortcuts are a game-changer for speed and efficiency. Audition allows you to assign custom shortcuts to almost any command, freeing up your mouse and allowing for a more fluid workflow. To access the keyboard shortcut editor, navigate to Edit > Keyboard Shortcuts. Here you can browse the available commands, assign new shortcuts, and modify existing ones.
Remember to choose shortcuts that are intuitive and easy to remember, avoiding conflicts with system-wide shortcuts. For instance, you could assign a shortcut to your most frequently used effect, saving you precious seconds each time you need it.
Organizing the Audition Interface for Optimal Workflow
A well-organized interface is the foundation of a streamlined workflow. Start by identifying the tools and panels you use most frequently. Keep these readily accessible by docking them prominently in your workspace. Less frequently used tools can be kept in easily accessible sub-menus or undocked and minimized until needed. Consider using color-coding or grouping similar tools together to improve visual clarity.
Regularly review and adjust your workspace to reflect your evolving workflow and preferences. This continuous optimization process will contribute significantly to your overall efficiency and satisfaction while working in Audition.
Advanced Spectral Editing Techniques
Spectral editing in Audition lets you manipulate audio with pinpoint accuracy, going beyond simple EQ adjustments. It’s like having a microscopic view of your audio’s frequency content, allowing for incredibly precise repairs and creative effects. This level of control is invaluable for cleaning up recordings, enhancing specific sounds, and creating unique sonic textures.This section explores the power of Audition’s spectral editing tools, focusing on frequency analysis for audio repair and enhancement, and demonstrating how these techniques can be applied to achieve specific creative goals.
We will cover the workflow and illustrate the process with practical examples.
Frequency Analysis for Audio Repair
Audition’s spectral display provides a visual representation of your audio’s frequency content over time. By analyzing this spectrogram, you can identify and target specific frequencies causing problems. For instance, a consistent hum at 60Hz can be easily identified as a vertical line in the spectrogram. Using the selection tools, you can precisely remove or attenuate this unwanted frequency, leaving the rest of the audio intact.
This is far more precise than using a traditional EQ, which might affect nearby frequencies. Similarly, clicks and pops, which appear as sharp spikes in the spectrogram, can be surgically removed without affecting the surrounding audio. This level of precision is particularly useful in audio restoration projects where preserving the original audio’s integrity is paramount.
Spectral Editing for Creative Effects
Beyond repair, spectral editing opens up a world of creative possibilities. Imagine you want to create a “whooshing” sound effect. You could start with a simple white noise burst. Using the spectral selection tools, you can carefully sculpt the frequencies, emphasizing higher frequencies to create a brighter, more ethereal whoosh, or focusing on lower frequencies for a deeper, more rumbling sound.
The control is extraordinary. Another example involves creating unique vocal effects. By selectively boosting or cutting specific frequency bands in a vocal track, you can drastically alter the tone and timbre. For example, reducing the presence of harsh high frequencies can create a warmer, more intimate vocal sound, while boosting specific mid-range frequencies can add character and depth.
The possibilities are limited only by your imagination.
Precise Audio Manipulation Using Spectral Editing Tools
Audition offers a variety of selection tools for precise spectral editing. The rectangular selection tool allows for the selection of specific frequency ranges over a defined time period. The lasso tool offers freehand selection for more complex shapes. The brush tool allows for more organic and less precise selection. Once a section is selected, you can apply various processing options, including attenuation (reducing the volume of the selected frequencies), amplification (boosting the volume), and even replacement with silence.
The level of control allows for extremely precise audio manipulation, making it an essential tool for audio professionals.
Creating Sound Effects with Adobe Audition
Adobe Audition is a powerful tool for more than just audio editing and mastering; it’s a sound design playground. Its diverse effects and manipulation capabilities allow you to craft incredibly realistic and creative sound effects, from subtle atmospheric textures to dramatic explosions. This section will explore several techniques and examples to get you started.
Creating compelling sound effects often involves a combination of recording raw sounds, manipulating existing audio, and using Audition’s built-in effects to synthesize new ones. The key is understanding how to layer, process, and subtly adjust sounds to achieve the desired result. Experimentation is key!
Generating Sci-Fi Laser Sounds
Creating a convincing laser sound often starts with a simple, high-pitched tone. You could record a high-pitched whistle or use a synthesizer within Audition to generate one. Next, apply effects like distortion (to add grit), pitch shifting (to create a whooshing effect), and reverb (to add space). Layering several slightly detuned versions of the basic tone will create a fuller, more complex sound.
Finally, automation of volume and pitch can add movement and dynamism. Imagine a short, high-pitched “pew” sound being distorted and layered to create a sustained, sweeping laser blast.
Crafting Realistic Footsteps
Realistic footstep sounds require careful attention to detail. Begin by recording your own footsteps on different surfaces (e.g., concrete, gravel, wood). These recordings will serve as your foundation. Then, using Audition’s spectral editing tools, you can adjust the frequencies to enhance or attenuate specific elements. For instance, you might boost the low-frequency content for heavier footsteps on concrete and reduce it for softer steps on carpet.
Adding subtle reverb will enhance the sense of space. Consider experimenting with EQ to fine-tune the frequencies to match the surface type and the weight of the person walking.
Designing Creaking Door Sounds
A believable creaking door sound can be achieved through a variety of methods. One approach is to record the actual sound of a creaking door. However, you can also create a convincing creak by manipulating existing sounds. For instance, a bowed string instrument, manipulated with pitch shifting and LFO effects, can be used to create a slow, deliberate creak.
Another technique involves using the noise reduction tool to remove unwanted frequencies and then using a pitch shifting tool to create a slow, dragging sound, layered over a subtle rubbing sound. The goal is to create a sound that’s both realistic and subtle.
Common Sound Effects and Audition Techniques
The following list Artikels several common sound effects and the techniques used to create them within Audition:
- Explosion: Combining several layered sounds – a whoosh, a crackle, and a low rumble – and applying distortion and reverb.
- Whooshing Sound: Using a high-pass filter and pitch shifting on a white noise or sine wave, adding reverb to create a sense of movement and distance.
- Water Droplets: Recording water droplets and then using EQ to enhance or reduce specific frequencies to create the desired sound. Adding reverb to simulate space.
- Wind Sound: Using a low-frequency sine wave and adding distortion, along with subtle modulation to create variations in intensity.
- Metal Screech: Recording a metal object being scraped and applying distortion, EQ, and reverb to create a sharper, more pronounced sound.
Closure
So there you have it—a whirlwind tour of Adobe Audition’s capabilities! From basic edits to advanced audio wizardry, Audition offers a comprehensive suite of tools for anyone working with audio. Whether you’re a seasoned pro or just starting out, remember to experiment, explore the features, and most importantly, have fun crafting your sonic masterpieces. Now go forth and unleash your inner audio engineer!
Answers to Common Questions
Is Adobe Audition good for beginners?
Totally! While it’s powerful, Audition has a relatively intuitive interface. Plenty of tutorials are available online to help you get started.
How much does Adobe Audition cost?
It’s part of the Adobe Creative Cloud subscription, so the price depends on the plan you choose. Check the Adobe website for current pricing.
Can I use Audition on a Mac?
Yep! Audition is available for both Windows and macOS.
What’s the difference between Audition and other DAWs like Pro Tools or Logic Pro?
Audition excels in audio restoration and mastering, while others might focus more on MIDI sequencing or virtual instruments. It’s really about finding the DAW that best fits your workflow and needs.
Does Audition have a free trial?
Yes, Adobe offers a free trial of the Creative Cloud, which includes Audition. This lets you test it out before committing to a subscription.